Pages

Wednesday, December 19, 2012

LIFE at WARP SPEED...but there is a RECIPE!

Recently, I have not been blogging...as many of you may have noticed. I have missed all of you...and I am so sorry I have been a neglectful friend.

With the changes to Blogger, I have been confused with how to set things up. (I never said I was computer savvy!). And I get frustrated and give up posting anything...and reading your blogs. Shame on me!


I've also had a huge increase in the number of cooking classes. THAT'S GOOD, but very time-consuming. (I could make it easier on myself and do the same foods each time, but that would be boring!!!)

And then, there is the grandbaby...Miss Evelyn. She's the light of our lives. (Mac Daddy and I LOVE being grandparents!) We're fortunate to have Eva and her parents nearby...which means we get to play with her fairly often! And that's so much more important than blogging!

There just doesn't seem to be enough time in each day to do everything I want to do... I haven't even painted in months!!!

So here's my plan...

I am going to enjoy the holidays with my family and friends. (I've already hosted 2 parties in 2 weeks! And this week, there's a neighborhood cookie exchange, an engagement party and a family reunion...for which I am making all the desserts!)

Beginning in the new year...I am going to organize my office so I can actually find what I am looking for...set aside office hours - and stick to them! Set aside painting time - and actually PAINT! (I have 3 commissions to complete in January) And blog at least 2 times each month. 

There...I said it! Now I have to do it. It's kind of like the rule of a road trip..."Once declared, it cannot be rescinded"...or so MacDaddy says.
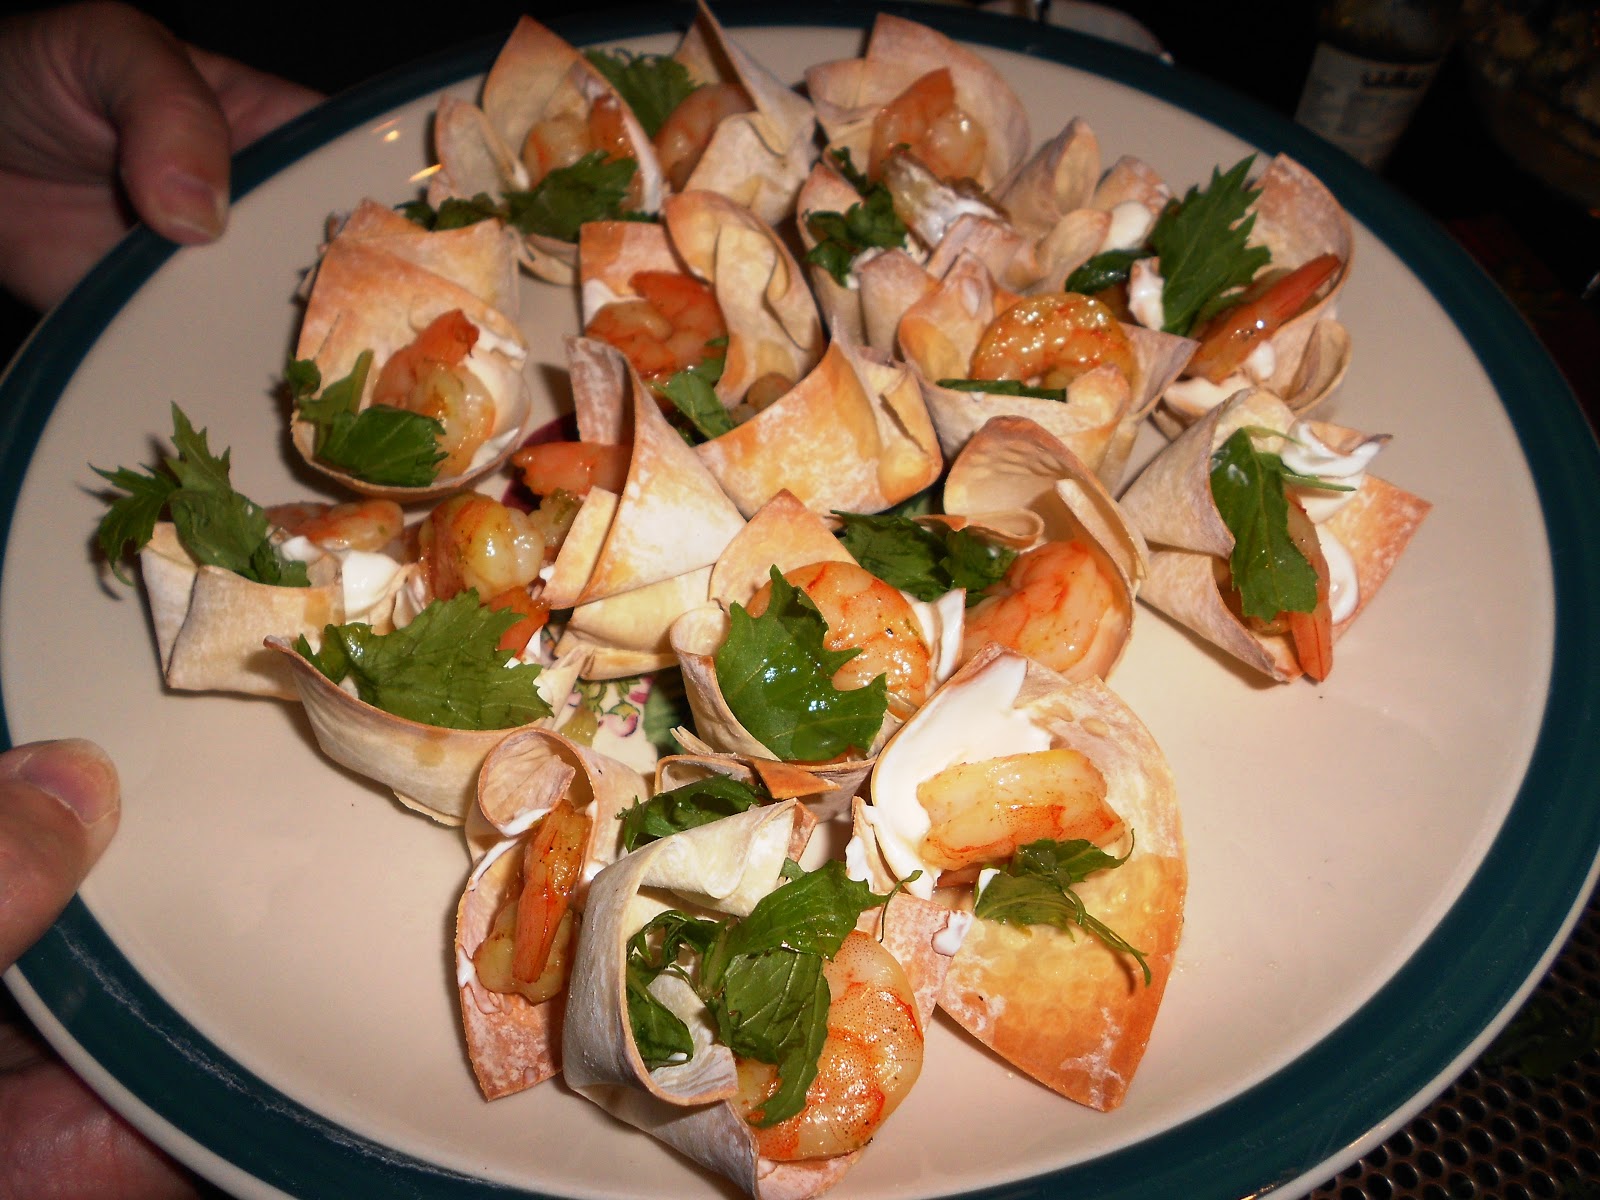

In the meantime...here's a delicious appetizer you might enjoy...

Chili Lime Shrimp Cups


These mini cups are perfect to serve at a party and are great warm or cold. You can make the wonton shells a day in advance; just keep at room temperature in an airtight container.
Ingredients
·         24 wonton wrappers
·         2 tablespoons olive oil
·         24 medium shrimp, peeled and deveined
·         1/2 teaspoon salt
·         1 teaspoon chili powder (I used ground red pepper)
·         2 limes
·         1/2 cup cilantro (or arugula)
·         3 tablespoons sour cream
Method
1.                   Preheat oven to 350 degrees F.
2.                   Place the mini muffin Flexipan on a perforated baking tray. Prepare wonton shells. Lightly brush wontons with 1 tablespoon of olive oil. Arrange (push into the pan, to form a cup. You do not need to cut these wontons…) in a mini muffin Flexipan. Bake 5-7 minutes until golden brown and crisp.
Toss shrimp with 1 tablespoon of olive oil, salt (sprinkle some over the shrimp), 2 teaspoons of lime zest (grated lime peel) and chili powder. Bake 5-8 minutes until shrimp are opaque throughout. (SILPAT and Perforated Tray)

To assemble, fill each wonton cup with a few leaves of cilantro, a small dollop of sour cream, one shrimp then top with a spritz of lime juice. 
(THIS MEANS JUST A TINY BIT OF JUICE SQUEEZED OVER THE TOP OF THE SHRIMP)

***I marinated the shrimp in the olive oil, lime zest, salt and red pepper for a couple of hours before I baked them. It saved time…with the final preparation.


Enjoy...and have a wonderful Christmas!!!
Jane

Friday, November 2, 2012

GARLIC CHICKEN, MUSHROOMS AND SPINACH on PASTA


Poor MacDaddy.... I have been so busy with teaching and planning cooking classes that my own husband was eating frozen meals (at least they were homemade) and leftovers... 

Finally, I had a night with no class and enough energy to attempt one of my quick meals...comfort food at its best!

This is one of MacDaddy's favorites...and I'm sorry, I do not have a recipe...it's just a "by guess and by gosh" meal of boneless chicken breasts, mushrooms, garlic, fresh spinach and pasta. (How can you go wrong with these ingredients!) And it can be prepared in less than 30 minutes! I guess you could call it 

Chicken Florentine with Mushrooms

....Whatever you call it, it's DELICIOUS!

Ingredients for 2 servings:

     2 boneless, skinless chicken breasts, cut into thick slices...about 4 per breast
     5 cloves of garlic, peeled and sliced (more or less to taste!)
     Canadian Steak Seasoning* (I use this on EVERYTHING! I love the blend of peppers, garlic and other seasonings.)
     Olive oil
     Butter - about 3 tbsp. (I use Olivio)
     1 pound mushrooms, sliced (I use white or baby bella)
     1 bag fresh spinach
     Pasta - I used mini farfalle (usually use Orzo) I prefer Dreamfields...less carbs!
     Parmesan cheese, shredded
     Milk...or half and half (just a little!)

In a large skillet (I like to use my electric skillet for this), melt the butter and mix with the olive oil...medium heat. Season the chicken with Canadian Steak seasoning and add it to the pan. Add the sliced garlic. Saute' the chicken until done, making sure the all sides are deliciously browned. Remove the chicken from the pan. Add the mushrooms to the pan drippings, adding a little butter if needed (or a little chicken broth). When mushrooms are done, remove from the pan and add the spinach. Just wilt it until all the leaves are tender. Remove from heat. Add the chicken and mushrooms back into the pan to keep warm until plating.

While the chicken, etc. is cooking, prepare the pasta according to the directions on the package. Drain. Place the pasta back into the pot and add Parmesan cheese and a little milk/half and half...just enough to coat the pasta/cheese mixture. (This is a VERY LIGHT version of an Alfredo sauce.)

To plate...place a serving of pasta on a plate. Top it with spinach. Add the chicken, followed by mushrooms. 

*Canadian Steak Seasoning is the name used by Tone's. Weber, Badia, and McCormick have their own blends and names. They are basically the same)

Enjoy!

Friday, October 26, 2012

YUM YUM CINNA-BUNS!

DON'T THESE ROLLS LOOK DELICIOUS???


Would you believe they were made with just a few simple ingredients? And all the rising was done OVERNIGHT in the oven?

But first...and I believe foremost...it starts with the perfect baking pan...the Demarle at Home Large Round Flexipan.

Now I know I talk about the Demarle products a lot...but they have streamlined my cooking life. And that's something to SHOUT about!!!

You know how much I hate cleaning up after a meal...
Well, with this pan (even with sticky, gooey cinnamon rolls) clean-up took about a minute! Yep...that's right! The rolls popped right out and all it took to clean the pan was a little hot soapy water, a quick rinse and shake to dry...and voila'...IT'S CLEAN.
Talk about EASY!!!

OK...enough about my pan....

 These cinnamon rolls are super easy to prepare...and you use FROZEN BREAD DOUGH!
 Place about 16 frozen rolls in the bottom of your pan. (If you are using Demarle, you do not need to grease/oil/spray the pan. If you are using conventional bakeware, PREPARE YOUR PAN.)

Sprinkle the rolls with about 3/4 cup brown sugar. Sprinkle several good shakes of cinnamon on top. (I use a lot, because we LOVE cinnamon...plus it's really good for you. Gotta have something "healthy" in this dish!) Then pour 1/2 cup butter (melted) over the top of the rolls/sugar. If desired, sprinkle with pecans. (You can use walnuts, but, hey, I'm southern. We live on pecans!)

Place the round mold on a Demarle perforated baking tray (you can use a regular baking sheet, if you don't have the holey kind) and cover the rolls with plastic wrap OR with an octagonal Silpat.
Put in a cold oven, overnight.

In the morning, open your oven and remove the tray with the rolls. Preheat the oven to 350 degrees. Then remove the plastic wrap/Silpat.
When the oven is ready, place the tray with the rolls back into the oven and bake for about 30 minutes.
This is what you get!

Let the pan of rolls sit for a couple of minutes, then invert onto a serving plate.
The round Flexipan slides right off... (I don't know how easy the conventional pans will do. I don't use them anymore!)
This is the cleanup! All I need to do is wash the Flexipan in some hot, soapy water, and shake it to dry it. (This is MY kind of cleanup!!!)
All you need to do now is pour yourself a cup of coffee and enjoy...

For a variation...You can use butterscotch pudding (the cook and serve kind), 1/2 cup brown sugar and 1 stick of butter (melted)...This is more like the traditional Monkey Bread.
or
If you wish, melt the butter in a saucepan, add the brown sugar, cinnamon, and, if desired, a little white sugar to the pan. Stir until melted. Dip the frozen bread dough into the butter mixture (USE TONGS! This mixture is HOT!!!), then place in the baking pan. Pour the remaining butter mixture over the rolls, cover and follow the rest of the directions.

This afternoon we're testing this technique with MINCED GARLIC and BUTTER!!! 
I can already smell it.....Ahhhhhhhh.

Enjoy!
Jane

I am linking up with Foodie Friday


Tuesday, September 25, 2012

THE GATOR

On a glorious afternoon, my friend and I were sitting by her pool, looking over the languid Florida lake when we noticed a small creature sunning on the lakeshore. It was a young gator! 

Still new to Florida, my friend had never seen one up close and was quite excited. We ran into the house to get our cameras
(of course!) and quietly headed to the beachfront to capture this little fellow on film. Being the foolish fearless Florida native who has lived near gators all my life, I slowly crept up behind the creature, snapping photos as I closed in. This little fellow seemed to be afraid to move...he just stayed still, posing for our shots.


We continued to close in on our gator, reveling in the thoughts that we could share our photos and story with our traveling husbands and imagining them telling us that we were stupid brave to try to capture our gator on film.

Closer and closer we crept with great trepidation, thinking that at any time, the gator would turn and snap at us...


that is until we noticed the sun glinting on his eye. 
It was a FAKE!!!


Did we ever feel foolish!!! But we did have a great story...


(This is a repeat from my early days of blogging. I saw a gator this morning, and thought of this tale. It was worth retelling again...)

Enjoy nature!
Jane

Posting with Outdoor Wednesday...

Saturday, September 8, 2012

CHICKEN ROULADES

Chicken Roulades...my new favorite dish to make. Why? 
Because it is so quick and easy ...and it's much more economical to prepare, than to purchase them at the meat market.

You know...I had not even thought of that until last night when one of my customers mentioned that she had just purchased 4 roulades for her family...and spent $20 on just the chicken dish! At our party, we made these tomato/spinach/Parmesan cheese stuffed roulades for under $10...and still had chicken left to make an appetizer!

The beauty of Chicken Roulades is that you can stuff them with just about anything. Chicken Cordon Bleu is a "roulade"...my Publix has these and other varieties available in the butcher shop. Other meat markets have them stuffed with crabmeat...cheddar cheese...even sausage! There are so many ways to prepare them...

The recipe for my version came from a fitness trainer...as part of the "HEALTHY COOKING" class we held last week. The original recipe required browning the roulades in a pan on the stove. But, I tweaked the recipe a bit, to use on my Demarle at Home Silpat...and to make the dish even easier! A quick dip in egg whites, mixed with a little chicken broth, then a roll in Italian Seasoned Bread Crumbs, and the roulades were ready to BAKE! You can bake these in traditional pans, but you will need to turn them during baking. But when using the Silpat and the Perforated Baking Tray, the roulades cook on both sides...in about 25 minutes! No turning....and best of all, cleanup takes just seconds with just a quick soap and water wash. 

These roulades were delicious, both hot and cold. They would also make a nice heavy appetizer...


For the "Healthy Cooking Class", we served the Roulades with red peppers stuffed with quinoa and vegetables, a shrimp/mango appetizer, Portobello Mushroom "Pizza", and Fresh Blueberry/Peach Crisp. Every recipe was approved by the fitness trainer...and all the dishes were DELICOUS and HEALTHY...and they're 
EVERYDAY EASY!

Enjoy! 

CHICKEN ROULADES
     with Tomato, Spinach and Parmesan Cheese


Boneless chicken breast (I used a cutlet...on sale), pounded THIN. Take the thin chicken breast...place a thin slice of fresh tomato on the breast. Add several leaves of fresh baby spinach. Sprinkle with a little shredded Parmesan cheese. Roll as tightly as you can. Fasten with toothpicks.  Dip the chicken roulade in a dish of beaten egg (or egg white) and a couple of tablespoons of chicken broth, mixed together. (Basically, you will "roll" the roulade in this mixture). Roll the roulade in Italian seasoned bread crumbs. (Light!) Place on Silpat/tray and bake at 375 for about 25 minutes (more or less, depending on the thickness of the chicken and the oven). Remove from Silpat and slice. (This is really a pretty presentation...white meat with red and green swirl)

If desired, you can make a sauce to pour over chicken...chicken broth, diced tomatoes, chopped spinach, a splash of white wine (actually calls for red wine vinegar...I think the wine would be better)and a little seasoning, such as garlic, onion, salt and pepper. Simmer while the chicken is baking...reducing the liquid. Spoon over the roulades. Sprinkle the top with a little chopped fresh basil.


I am connecting this Foodie Friday this week...check out all the fab recipes!

Thursday, August 30, 2012

RED PEPPERS STUFFED WITH QUINOA AND VEGGIES

HEALTHY EATING...

    That's what my host wanted to share with her guests.


On Saturday, I taught a cooking class for a fitness trainer and her clients. She wanted to show her guests that healthy foods can be delicious. She brought over several recipes she had clipped from magazines or copied from her cookbooks. I used these recipes as a guide and remade them into time-friendly recipes...things we could easily do during a cooking class. This Red Pepper recipe can be prepared using whole peppers. I used quarters...

Here is one of the favorite recipes...

RED PEPPERS STUFFED WITH QUINOA AND VEGGIES


3 RED PEPPERS (ORANGE OR YELLOW WORK, TOO)

OLIVE OIL

QUINOA

BLACK BEANS

CHOPPED TOMATO (1 MEDIUM)

CARROTS (CHOP OR THINLY SLICE…I USED ABOUT 6 BABY CARROTS)

FRESH SPINACH (CHOP…ABOUT ½ CUP)

RED ONION (FINELY CHOPPED…ABOUT ¼ CUP)

GROUND RED PEPPER, TO TASTE (I USED 2 SHAKES…ABOUT ¼ TSP)

PARMESAN CHEESE (FRESHLY SHREDDED…APPROXIMATELY 1 TSP PER PIECE OF PEPPER)

Cut red (or orange) pepper into quarters. Clean out the insides really well. Brush with a little olive oil. Set aside.
Cook 1/2 cup Quinoa with 1 cup water*...in Medium Round Flexi-Mold with Octagonal Silpat on top...in the microwave for 8 min on H. Stir, then cook an additional 2 minutes (you many need to add 2 tbsp of water here, just use your judgement) To the cooked quinoa, add black beans, thinly sliced carrots, chopped fresh spinach, finely chopped onion, a tsp of Olive oil, a little ground red pepper (be careful here...start with just a LITTLE bit and add more if desired), chopped tomato (I actually used about 1/2 can drained Rotel tomatoes with green chilis...because it was in the fridge). Add a little salt, to taste (I sprinkled Sel Gris...really strong flavor. I had to add more cooked quinoa to cut the salty taste. Be careful!) Mix all together, then mound mixture into pepper slices. Place the stuffed peppers on the Silpat/Perforated Baking Tray. Sprinkle a little shredded Parmesan Cheese on top and bake at 375 degrees for about 20 minutes. The peppers were softer, but still firm and a bit crunchy. The filling was warmed and cheese was melted. (You could bake for a little longer, if you wanted softer peppers.)

We enjoyed these stuffed peppers either hot or cold... They were served with Chicken Roulades (recipe to come), and a simple spinach salad. It was a very colorful plate...the best kind! I will share more of these recipes next week...


*Directions for cooking Quinoa in the microwave were found online. I googled cooking quinoa in the microwave. Stove top directions are there, too.


Enjoy!!!
Jane

I am linking with FOODIE FRIDAY.

Thursday, August 16, 2012

PARMESAN HASH BROWNS and BUTTERMILK BLUEBERRY BREAKFAST CAKE

Yesterday, I posted photos (on Facebook) of two more delicious dishes I made in my Demarle at Home FLEXIPANS...and I have had requests for these recipes over and over again... Since it's easier to share the recipes through my blog... here goes!


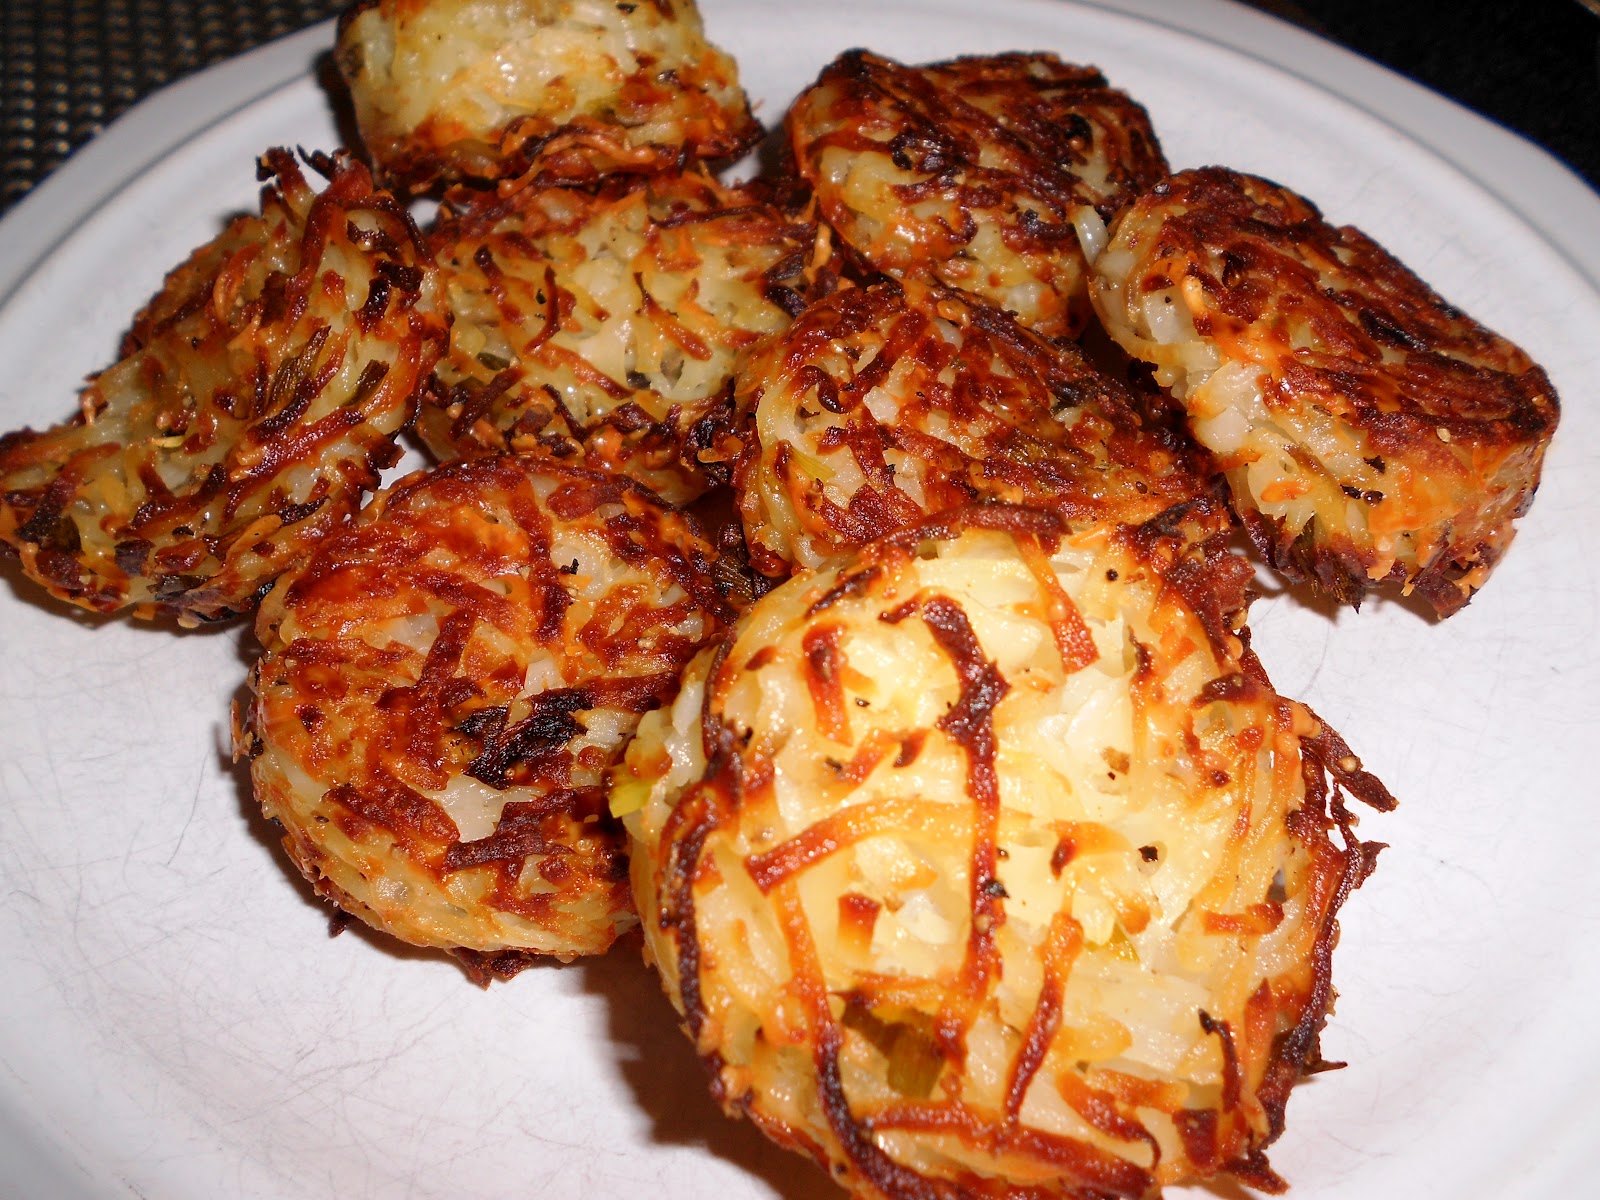
Parmesan Hash Brown Cups
By Monica  http://www.theyummylife.com            Servings: makes 12
(The original recipe has been modified to use in Demarle at Home Flexipans)
Ingredients
·         1 (20 oz) bag Simply Potatoes Shredded Hash Browns; OR 3-1/2 cups shredded russet potatoes, rinsed and squeezed dry in a towel
·         3 green onions, chopped (approx. 1/3 cup), both white and green parts (I used 2)
·         1/2 cup grated Parmesan cheese
·         1 teaspoon kosher salt
·         1/2 teaspoon black pepper
·         2 tablespoon olive oil
Directions
Preheat oven to 350 degrees. Place the Muffin Flexipan on the medium perforated baking sheet and set aside. In large bowl, combine potatoes, onions, cheese, salt, and pepper. Toss lightly with a fork. Drizzle on olive oil. Toss with fork again until mixture is well combined. Spoon mixture evenly into 12 muffin cups. With the back of the spoon, apply gentle pressure to pack mixture into each cup. Bake for 60-75 minutes in lower third of oven. Let rest for 5 minutes. The potato cups should pop right out of the flexipan, but if needed, gently press the bottom of the muffin flexipan to release each potato cup out and place on serving plate. (The recipe suggests inverting the potato cup, serving it bottom side up, but there was no difference in the top or bottom. Both were perfectly browned . Good served warm or room temperature.

MAKE AHEAD FOR COOKING LATER: Combine mixture, spoon it into muffin flexipan, cover with plastic wrap, and refrigerate until ready to bake. Remove from fridge 30 minutes before baking time. May be made the night before to cook and serve for breakfast the next day.

MAKE AND COOK AHEAD FOR REHEATING LATER: These are best when eaten freshly baked. However, they can be baked ahead of time, refrigerated or frozen, and reheated before serving. They lose some of their crispiness when reheated, but the texture and taste is still good.

FOR BITE-SIZE TATER TOTS - make them in mini muffin pans.
 

SERVING SIZE = 1-2 hash brown cups per person


BUTTERMILK BLUEBERRY BREAKFAST CAKE


(MacDaddy REALLY loved this! Light texture, full of fresh blueberries, and not too sweet!)

Buttermilk Blueberry Breakfast Cake
Recipe modified to use in a Demarle at Home Flexipan

Serves 6-8
½ cup unsalted butter, room temperature

2 tsp. lemon zest or more — zest from 1 large lemon

7/8 cup* 

1 egg, room temperature
1 tsp. vanilla
2 cups flour
2 tsp. baking powder
1 tsp. kosher salt
2 cups fresh blueberries
½ cup buttermilk


2 Tbsp. sugar for sprinkling on top of cake

* 7/8 cup = 3/4 cup + 2 tablespoons


1. Preheat the oven to 350ºF. Cream butter with lemon zest and 7/8 cup of the sugar until light and fluffy.

2. Add the egg and vanilla and beat until combined. Meanwhile, toss the blueberries with ¼ cup of flour, then whisk together the remaining flour, baking powder and salt.

3. Add the flour mixture to the batter a little at a time, alternating with the buttermilk. Fold in the blueberries.

4. Place a Demarle at Home Flexi-pan on the Medium Perforated Baking Sheet. DO NOT USE OIL, BUTTER, NON-STICK SPRAY!!! Spread batter into pan.  Bake for 35 minutes. Check with a toothpick for doneness. If necessary, return pan to oven for a couple of more minutes. (Note: Baking for as long as 10 minutes more might be necessary.) Let cool at least 15 minutes before unmolding the cake onto a serving plate. Sprinkle the cake with the remaining sugar.

***I found both of these recipes on Pinterest and modified them to use in Demarle at Home Flexipans...Both dishes come out cleanly from the molds/pans. Cleanup is just a quick soap and water wash. These Flexis make cooking healthier and EVERYDAY EASY!!! If you would like to know more about these pans, please email me.

Enjoy!
Jane

I am linking up with Foodie Friday!